Follow the guide below to add a sponsor's logo to your content!
Step 1: Go to Advanced Options
After branding your design, scroll to the bottom of the editing menu on the left side of the screen. There is a button labeled “Advanced Options”, which brings up a few more options for editing your graphic.
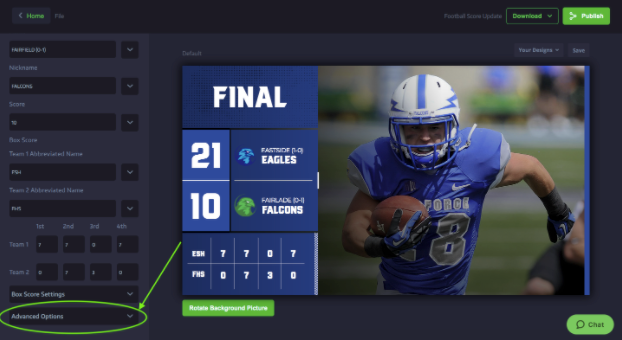
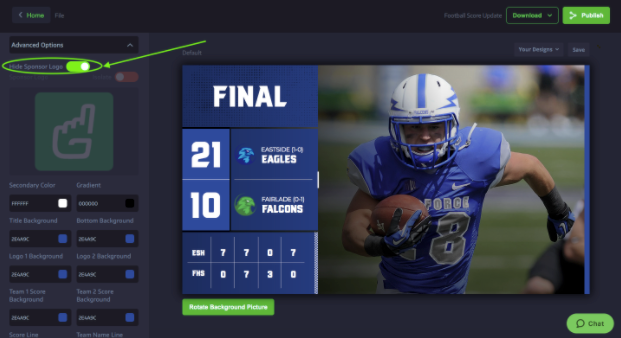
Once “Advanced Options” is opened up, one of the buttons that will appear is labeled “Hide Sponsor Logo.” Toggle this button to make the sponsor logo appear on the graphic preview.
Step 2: Change the logo
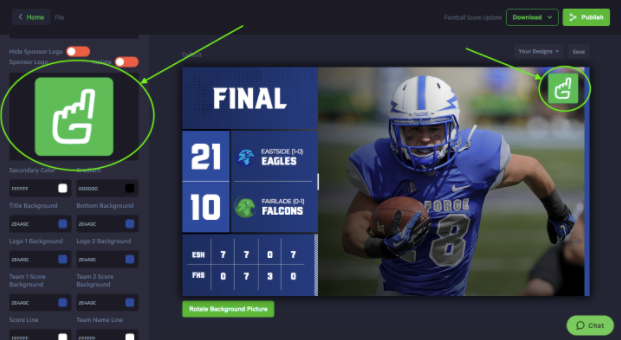
When you toggle the “Hide Sponsor Logo” button, the Gipper logo will appear in the upper right corner of your design. You can change the logo by inserting a logo from your gallery or from your device, same as adding a school logo to a design.
Wrap Up
You can use sponsor logos on your visual content in a variety of ways. Many schools drive revenue by offering sponsorships to businesses, in which their logo appears on the school’s visual content. This is super important now because it can be a great way for schools or athletic departments to drive additional revenue at a time when there are no athletic events occurring.
For schools with equipment deals, they can add the company’s logo to any content they make. In other cases, some schools just use this as a secondary school logo on their graphics! Regardless of what you use it for, adding a sponsor logo to content can be a great idea for your program and it’s super easy on Gipper.
I hope this was helpful and thanks for reading!
- Jake
Jake Engelberg is a blog writer at Gipper. Gipper is a platform that helps high school athletic departments create professional sports graphics for social media - in seconds, on any device, and without needing any design experience.
Learn more @ gogipper.com/athletics
OTHER RESOURCES YOU MIGHT LIKE


.png)