While sharing social media content on Gipper is incredibly easy, using Saved Designs can make it even easier! Saving a Design on Gipper allows you to save all of your branding elements (colors, logo, etc) on a particular template, helping you save a lot of time when creating and sharing content for your school.
When using a Saved Design, your branding is set, so all you have to do is plug in basic information. The result? You can share branded, visual content in literally seconds, from any device (Yes, even from your phone on the sidelines!).
The tutorial below walks through how you can Save a Design on Gipper and then access it for future use!
Step 1: Creating the Graphic
Heading into a season, there are certain graphics that you know you’ll be using. For example, “Game Day” or “Score Update” graphics. Using Saved Designs, most of the branding elements in these graphics can be added before the season starts. That way, if you know you are going to reuse the same graphic again and again, you only have to make it once at the beginning of the year and then you can keep using the same Saved Design!
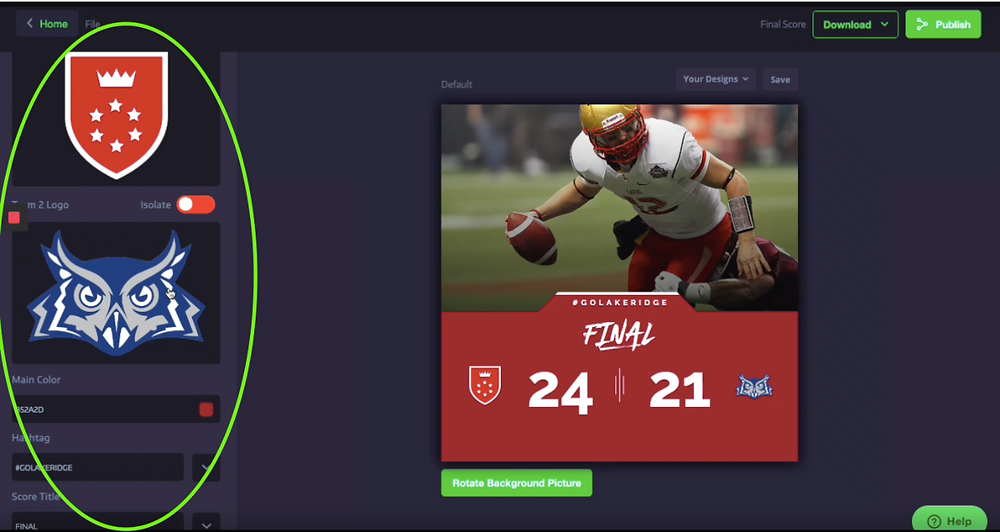
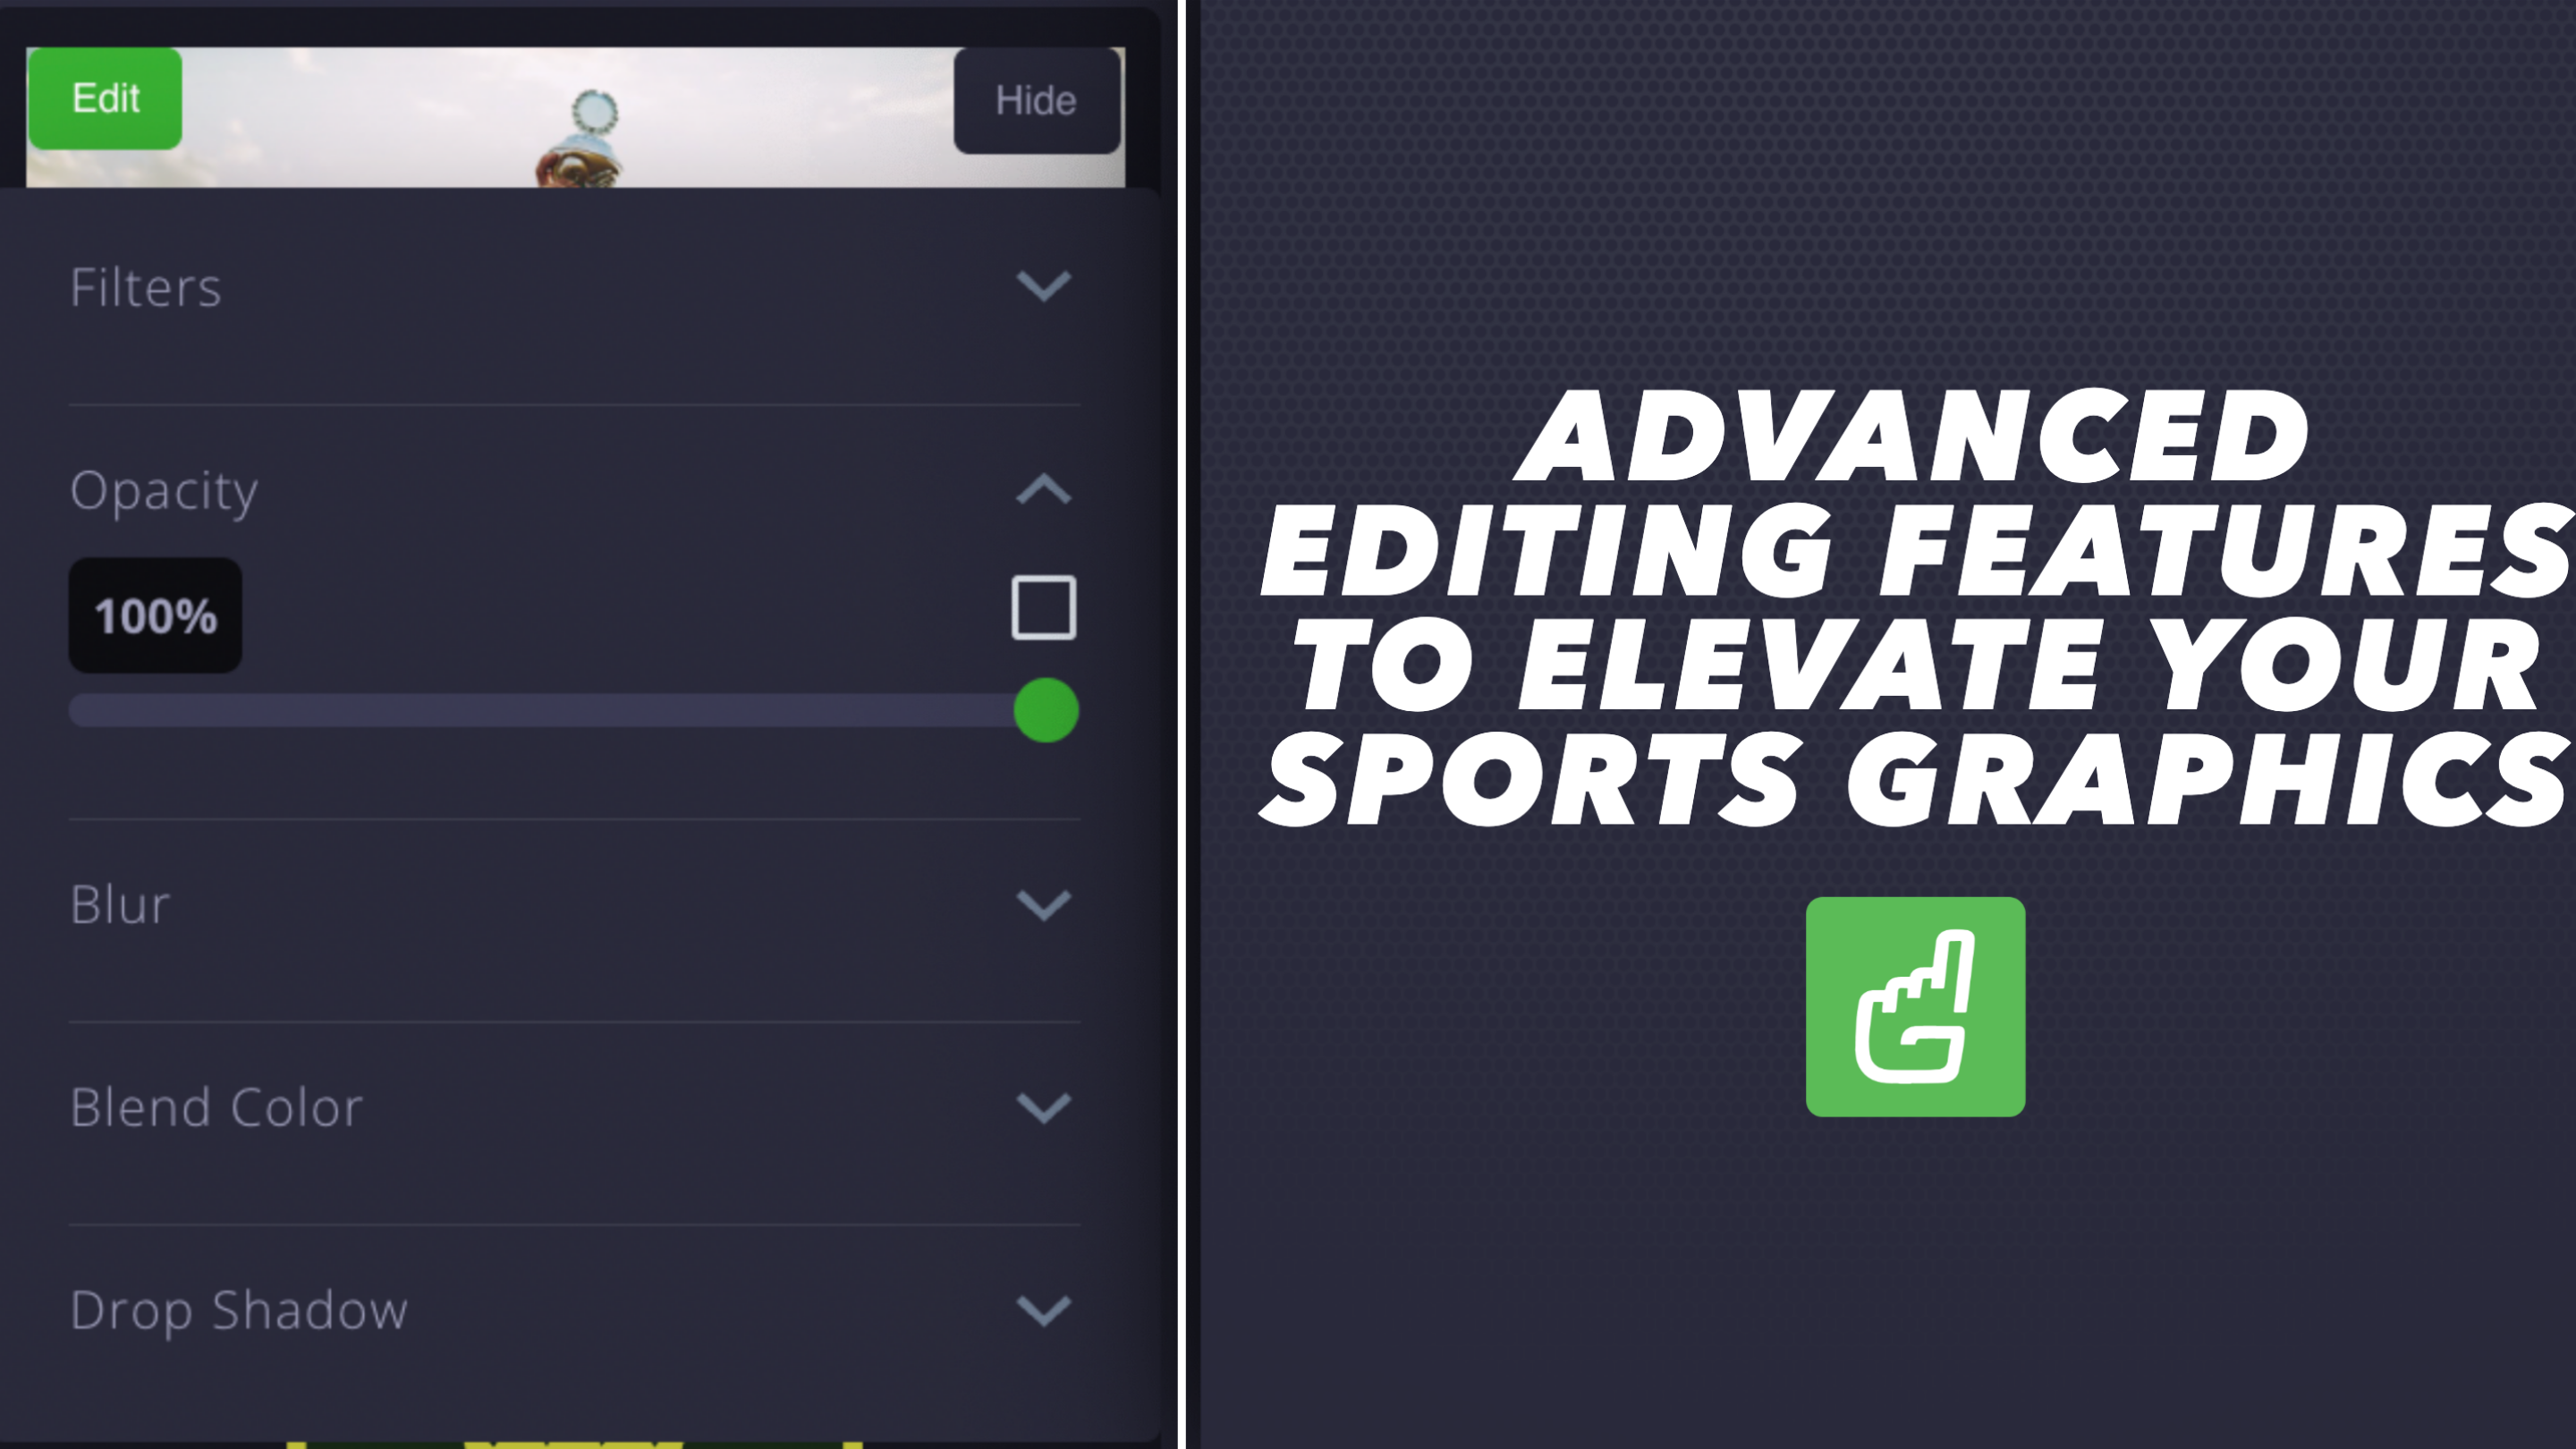
The first step to creating a Saved Design? Add your school's branding. Below is an image that shows the Editing Section on Gipper. Here, you can add your team colors, logo, and change any other design elements of the template you’re working on.
Step 2: Saving the Design
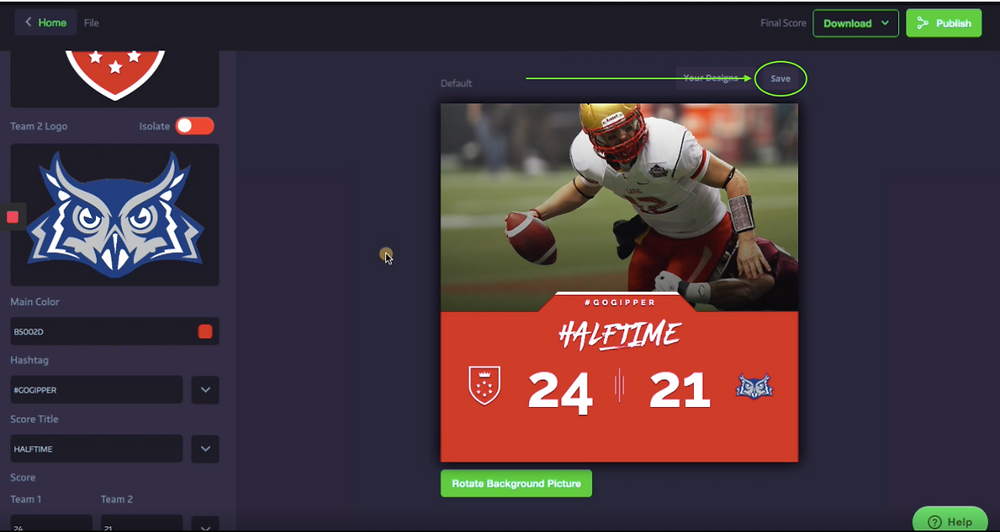
After you're finished adding your schools branding to the graphic, the next step is to save it. There are two ways to save on Gipper. You can hit the "Save" button - which is positioned just above the top right corner of the graphic. Or, you can click the "File" button in the top left of the platform screen (to the right of the "Home" button). After clicking the "File" button, a drop down will appear where you can then click "Save." You will then have the option to title your design.
Once you’ve named it, and click “Save,” you’ll have created a Saved Design! You can then access this later on when creating future content on Gipper.
Step 3: Reusing the Template at a Later Date
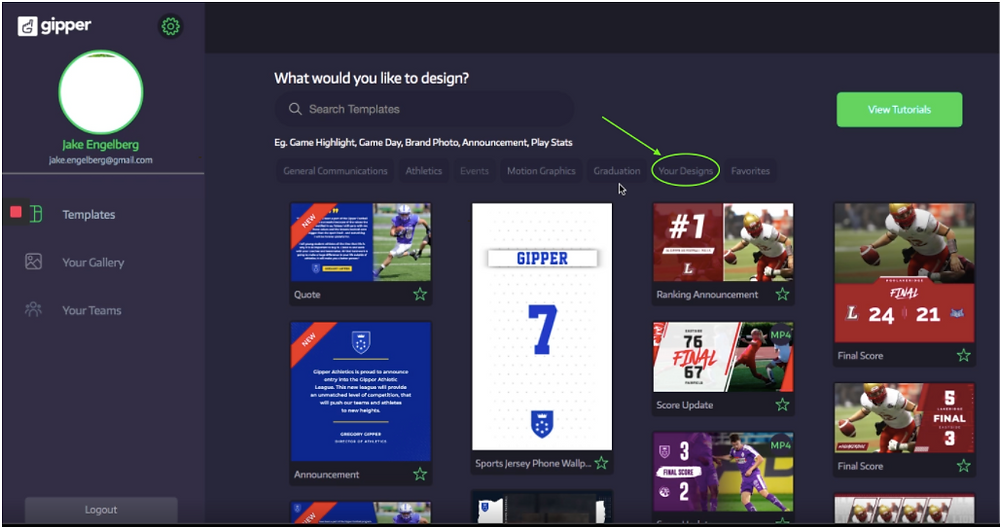
When the next time comes to use the graphic, all you have to do is open Gipper, click the “Your Designs” filter, and open the graphic you would like to use. This “Your Designs” filter on Gipper shows all of your Saved Designs in one easy to access location.
Now instead of having to make a new graphic from the beginning, all you have to do is edit the score and opponent logo before your graphic is ready to publish! Below is an image that shows how to access Your Designs from the Template Dashboard.
Conclusion
To wrap up, saving a design on Gipper is super easy and can be helpful in many ways. Most importantly, it saves you time! Instead of having to create a new graphic each time you have to make a post, most aspects of your design are already saved.
This is especially helpful when using Gipper on mobile, as Saving a Design helps you avoid having to design content on the go. That way, you can use a Saved Design, plug in some basic information, and share to social media in just seconds, right from your mobile device! This will allow you to share branded, visual content to social media in seconds and from anywhere!
On top of this, using consistent graphics for the same type of information creates consistency that is appealing to audiences. Viewers can begin to connect different graphics to the information they are giving, which is something that they appreciate seeing!
Hope this was helpful and thanks so much for reading!!
- Jack
Jack Zamore is the Chief Marketing Officer at Gipper. Gipper is a platform that helps high school athletic departments create professional sports graphics for social media - in seconds, on any device, and without needing any design experience.
Learn more @ gogipper.com/athletics
OTHER RESOURCES YOU MIGHT LIKE


.png)